A budget-friendly before and after of a tiny pantry closet makeover. Simple DIY steps to turn a small closet into a fully working kitchen pantry.
I am finally ready to walk you through the transformation of the tiny pantry closet located just off my kitchen. In my old house, I enjoyed a roomy double-door pantry that swallowed up oversized pet food bags, canned goods, and even bulk paper products. It absorbed nearly every grocery run without breaking a sweat.
I grew accustomed to that luxury, and after relocating to the lake house, I immediately felt the absence of such a generous, well-ordered storage space. I treasured being able to swing open the doors and spot every item in one glance. The challenge with the lake house pantry, however, was that it only featured deep shelving, which made any item that drifted toward the back nearly impossible to locate. On top of that, the whole space looked gloomy and worn, finished off with a yellow plaid liner.
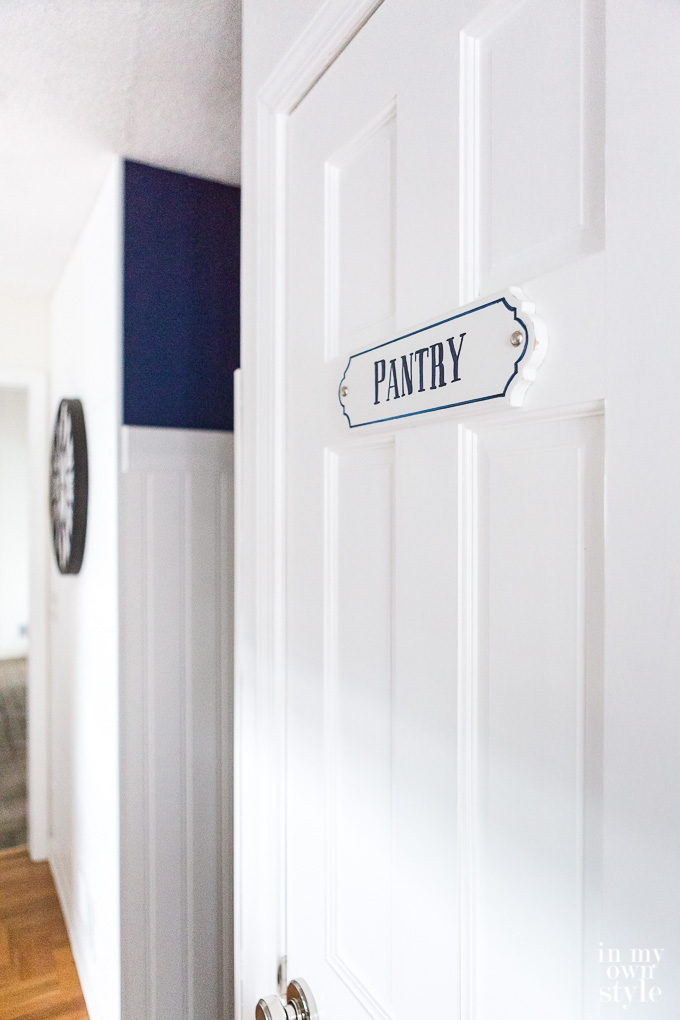
Like every project I tackle, this one stayed well within a tight budget. The priciest piece I had to buy was the solid wood door that took the place of the old bi-fold louvered one. I even crafted a little "Pantry" sign to hang on the new door, tying it in with the other signs mounted on doors in the "hallway of darkness" just around the corner. You can find the full tutorial for the French enamel-style sign in a separate post.
This is the BEFORE snapshot of the pantry. The closet was closed off by a louvered door that I had painted white during our first year in the home. It did its job, yet it fell short because the door surface could not support any racks or shelves for extra storage.
The original shelves were spaced nicely, but the contact paper covering them was torn and outdated. The interior wall finish had yellowed over time. My goal was a crisp, airy, light-filled look. I researched the idea of ripping out the existing shelves and replacing them with pull-out versions, but the cost was prohibitive and I lack the woodworking know-how to build them myself. Pull-outs would also have eaten up roughly 6″ of storage on either side of every shelf, since they can only extend as wide as the doorframe. The actual closet cavity is 12″ wider than that. I eventually landed on a simple, wallet-friendly fix that I will share later in the post.
My first move was to repaint the closet interior with Sherwin Williams Pure White in a semi-gloss sheen to bounce more light around. After that, I stripped the old liner and laid down fresh white vinyl contact paper.
The next task was swapping the bi-fold louvered door for a solid wood six-panel version. I finished it with the exact same paint I had used on my kitchen cabinet makeover. A hollow six-panel door would have run about $70 less, however…
… the ClosetMaid wire door rack we planned to mount required a solid door capable of supporting the weight of the items that would be loaded onto it.
I have gathered every product used in this transformation in a list at the bottom of the post.
Mounting the wire door rack was straightforward, with screws driven directly into the new door. We did end up making a single modification to make the width work properly.
We trimmed one of the vertical rails that fastens to the door so the doorknob would not interfere. Once trimmed, we double-checked that the holes beneath the knob supporting the wire shelves lined up evenly with the opposing vertical rail of the rack.
I had planned to install stick-on light strips, a suggestion from a reader who had used them in her own closet. I purchased a set, but wherever I tried to position them, the door could no longer close. Honestly, I was not disappointed, because once the walls were painted and the shelves lined in white vinyl, the closet lit up beautifully on its own.
Even with all the supplies loaded inside, the closet now feels wonderfully bright.
The wire shelves on the door rack slide up or down with ease to suit your storage needs. I positioned each one so that, with the door shut, the underside of every wire shelf clears the top of the wooden shelves inside the closet.
My Approach to Organizing the Tiny Pantry Closet
I mentioned earlier that I had explored pull-out shelves and decided against them. Instead, I discovered a workaround I am thrilled with. I picked up clear organizing bins in assorted sizes, each with built-in handles, and grouped similar items inside. When I need something, I simply tug the bin forward. Because the bins are transparent, the contents are always visible.
To keep the bins in order, I skipped labeling the bins themselves and instead went with clear shelf label holders. Should I swap out what is stored in any bin, I just swap the label, no sticky residue to wrestle with.
The shelf label holders make it easy to slide labels around, swap them, or reuse them as needed.
The clear holders are designed to grip a standard 7/8″ thick shelf. My shelves were a hair thicker, but with a little extra push the holders still clamped on securely.
I reinstalled the two puck LED lights that had been there originally. Since I already owned them, I went ahead and put them back, though I have yet to flip them on since the makeover, the white walls brighten the space more than enough.
I clipped label holders onto the front edge of the canned goods shelf as well, placing one in front of every three-tiered rack that sorts canned items by category. The tiered design lets me spot even the cans tucked in the back row.
The label holders glide along the shelf edge and can be repositioned whenever you like. Popping one off is as easy as giving it a gentle tug.
Further down in the post I am offering two free printable label sheets sized to fit the holders.
On the floor of the closet, two cardboard tubes stand upright, stuffed with plastic grocery bags for grab-and-go use. They have served me well for ages and even lived in the big pantry at my previous home. The bags stay contained and tidy inside. Foils and wraps rest on top of the HVAC vent.
The whole project moved along quickly. I leaned on Ed to help hang the door, but the rest of the work was straightforward DIY. The grand total landed around $300.00, with the solid wood door alone consuming roughly half of that figure.
Free Printable Labels Sized for Clear Shelf Label Holders
Click to print: Clear Shelf Label Holder LABELS – Filled In
Click to print: Clear Shelf Label Holder LABELS – BLANK
- Print whichever sheet fits your needs. One sheet is blank so you can write in your own items with a marker. The other sheet comes pre-filled with common pantry staples.
- Trim the labels using scissors or a paper cutter.
- Slide each label into a holder and clip the holder onto the edge of a shelf.
Crafting Labels for the Wire Door Shelves
The wire shelves on the door rack called for a different labeling approach. A simple paper strip with the item name written on it turned out to be the most effective solution.
supplies needed:
- Computer / Printer / Paper
- Self-Seal Laminating Pouches or sheets
- Scissors or paper cutter
- Small Brass/Silver Fasteners – found in the scrapbooking aisle of any craft store
- To produce the wire door rack labels, I typed my list of item names in Microsoft Word, leaving a generous gap above and below each entry. That extra space came in handy once I cut the strips out, leaving room at the top and bottom. I printed the sheet, then ran a Self-Seal Laminating sheet over it, sticky side down, to seal and protect the paper.
- To attach: I marked the midpoint of the rack with a piece of tape. I then located the center of a label strip and aligned it on the front edge of the wire shelf. I wrapped the ends of the strip around the 4th wire outward from the center on either side.
- On the strip, I penciled in a dot marking where each silver fastener would go. I lifted the strip off the shelf, kept the wrapped ends folded, and punched a hole at each mark. When I unfolded the ends, two clean holes appeared.
- I set the strip back onto the shelf, lined the holes up, and pressed a fastener into each one to lock it in place.