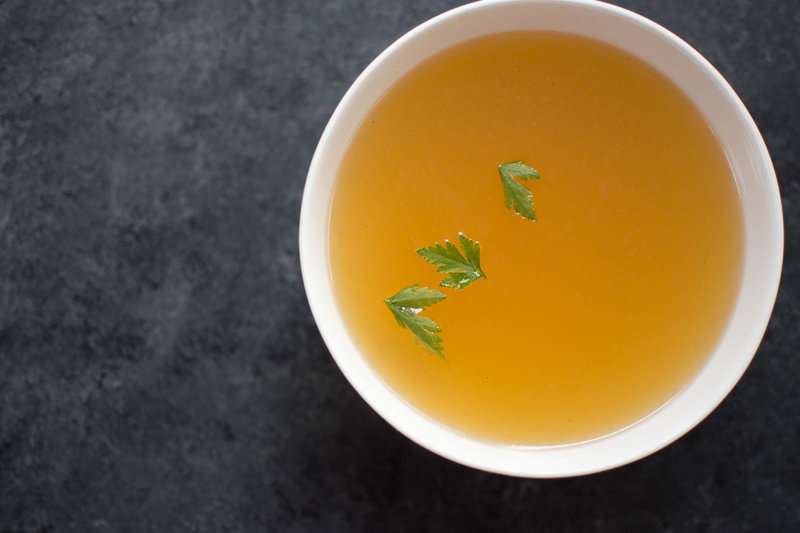
Bone broth is a cornerstone of the traditional foods kitchen and a beloved staple in homes around the globe. Its savory, umami-packed taste enriches soups, stews, and sauces, while its high protein content stretches the protein derived from other ingredients like beans and legumes. When prepared correctly, bone broth offers a nourishing, delicious, and protein-dense food that is both simple and affordable to create.
Of course, what you aim for when crafting bone broth is not just an exceptionally rich flavor but also a smooth, velvety texture that gives soups, stews, sauces, and sipping broths substance. That body comes from gelatin, and broth makers consistently seek to simmer a broth that develops a fine gelled consistency—sometimes firm and springy, other times slightly wobbly. It can be deeply frustrating for newcomers to miss out on that satisfying jiggle in their broth.
Bone Broth and Gelatin Explained
Bone broth gels because collagen, a structural protein present in the connective tissue of meaty and gristly bones, breaks down during extended cooking and dissolves into the liquid. As the broth cools, the proteins re-align to form a fine, springy gelatin.
A robust gel indicates a high-quality broth, as it signals the broth is particularly rich in protein, and when that gel liquefies upon reheating, it imparts body and a pleasing mouthfeel.
What to Do When Bone Broth Doesn’t Gel
First, if your bone broth hasn’t set and lacks gel, it remains perfectly safe to consume. It might not be especially rich in gelatin or protein, and it will certainly lack the body of a properly prepared broth, but there’s no need to discard it.
Numerous factors influence whether your broth will gel, and a few adjustments in how you choose bones for your pot, the amount of water you add, the simmer duration, and the cooking temperature can mean the difference between a thin, watery broth and one that bounces like the Jell-O from your childhood.
Select a Mix of Bones
Bone broths derive their gelatin from collagen in connective tissue and their flavor from meat, with well-worked muscles like shanks and necks being especially tasty. Not all bones are collagen-rich, nor do all bones come with meat attached, so to craft a good pot of broth, you need a variety of bones to achieve the right balance of collagen-rich connective tissue and flavor-packed meat.
Marrow bones, though popular, are not ideal for broth making because they lack both the connective tissue that gives bone broth its gel and the meat that provides flavor. Including one or two in your pot is fine, but simmering an entire batch of marrow bones won’t produce a good broth. Instead, try roasting them or turning them into a sweet or savory bone marrow custard.
Choosing Bones for Broth
- Beef, Bison, and Lamb Bone Broths: A mix of neck bones, shanks, oxtails, and knuckles works especially well.
- Chicken, Duck, and Turkey Bone Broths: Use the whole bird, the carcass of a roasted bird as in this turkey bone broth or this chicken stock, and add a few chicken, turkey, or duck feet if desired. You can also make a broth solely from chicken feet. If you’ve broken down your bird, save the wings, feet, neck, and back for bone broth, and create kitchen scrap broth using this cookbook.
- Pork Bone Broth: For pork bone broth, use neck bones, hock, and feet. If available, pig ears also make a nice addition.
Use the Right Amount of Water
Adding too much water relative to a small quantity of bones will yield a thin broth that won’t gel properly. You’ll extract collagen from the bones, but it will be too diluted to form a solid gel.
Fill your pot with bones and cover them with clean water by about two inches. This amount is generally sufficient to extract collagen from the bones and produce a deeply flavorful broth without being so much water that your broth lacks taste and a nice, gelled structure.
Incorporate an Acid
Adding an acid, such as vinegar or wine, to your bones and water helps extract collagen from the connective tissue attached to those bones. Contrary to what you may have read elsewhere, an acid added to the broth pot won’t reliably extract minerals or create a mineral-rich broth, but it does aid in efficiently extracting collagen. Acid is also used in the commercial production of gelatin from beef hides.
Many broth makers add apple cider vinegar to the pot because it’s inexpensive or because they’ve read Nourishing Traditions. I find that the flavor improves when you use wine rather than vinegar to make bone broth and stock, and I recommend it in my cookbook, Broth and Stock. So if you’ve opened a bottle of wine to enjoy with dinner, save a cup for the stock pot.
Control Your Temperature
A French proverb warns, “To make a good soup, the pot must only simmer or smile.” In plain terms, be careful not to overboil your broth!
Heat helps extract collagen from connective tissue, but prolonged exposure to high heat can break down the protein structure so much that the broth fails to gel and often turns cloudy.
When making broth on the stove, bring it to a rolling boil over high heat, then immediately reduce the temperature to low or medium-low and let it barely simmer, uncovered. This is generally not an issue with pressure cooker broths, but it can be a problem with slow-cooker broths. If using a slow cooker, cook the broth on high until it reaches a boil, then continue cooking on low.
Simmer Long Enough, But Not Too Long
It takes time to soften connective tissue and extract collagen. If you cook your broth for too short a time, it will lack protein and gelatin. Conversely, cooking it too long can develop overcooked, off flavors that become particularly unpleasant if you’ve added vegetables to the pot, as they tend to break down, tasting both bitter and overly sweet.
So how do you determine the right cooking time for bone broth? The duration depends on the type of bones used: smaller bones require shorter cooking times, while larger bones need longer.
Ideal Simmering Times
- Chicken, Duck, Turkey, and Goose Broth: Simmer for at least 4 hours and up to 12 hours.
- Pork and Lamb Bone Broth: Simmer for at least 6 hours and up to 18 hours.
- Beef and Bison Bone Broth: Simmer for at least 12 hours and up to 48 hours.
You Can Cheat a Little
Remember, if your broth didn’t gel, you can still use it. But if you still want that wonderful bounce, here’s a little trick: Add some gelatin!
Bring a quart of broth to a boil on the stovetop. As the broth warms, dissolve 2 tablespoons of gelatin (I use this brand) in 2 tablespoons of water. When the broth boils, stir in the softened gelatin until it dissolves completely. Turn off the heat and either serve the broth immediately or transfer it to the fridge to cool.
Quick Tips for a Gelatinous, Flavorful Broth
My second cookbook, Broth and Stock, offers plenty of tips for making wholesome, tasty bone broths and stocks, along with extensive troubleshooting advice.
You can find bones for broth making at most farmers’ markets, natural grocers, and online.
An electric pressure cooker makes excellent, easy, no-fuss bone broth that generally gels very well, eliminating the need to monitor cooking time or temperature.
If you prefer not to make your own broth or lack the time, it’s worth keeping a traditionally prepared, slow-simmered broth on hand, like this one.